
In an era where environmental consciousness is on the rise, harnessing the power of green energy through solar panels has become a popular choice for homeowners looking to manage electricity costs and contributing to a sustainable future, all while carefully considering the associated Solar Panel Cost.
As you embark on this eco-friendly journey, it’s crucial to understand the step-by-step process of installing solar panels. This comprehensive guide will walk you through each stage, ensuring you make informed decisions for a seamless transition to solar energy.
Step 1: Site Inspection and Survey
Before the solar panels find their place on your roof, a thorough inspection of your property is paramount. Experienced solar panel installers will ask key questions to tailor the installation to your needs:
- What type of roof do you have?
- What is the orientation of your roof?
- Is the roof the optimal location for maximum power generation?
- What are your energy consumption requirements?
- How many solar panels are needed to meet your energy goals?
- What is the roof’s capacity for holding solar panels?
- What is your budget for the installation?
This initial survey provides installers with essential information to formulate a customized plan for your solar installation.
Step 2: Marking Out the Territory
Once the survey is complete, the next step involves marking out the roof to determine the precise locations for mounting brackets and solar panels. This process ensures that the installation maximizes both efficiency and safety. The roof’s holding capacity is carefully considered, and in some cases, a separate mounting space may be chosen. This step sets the foundation for a successful solar panel installation.
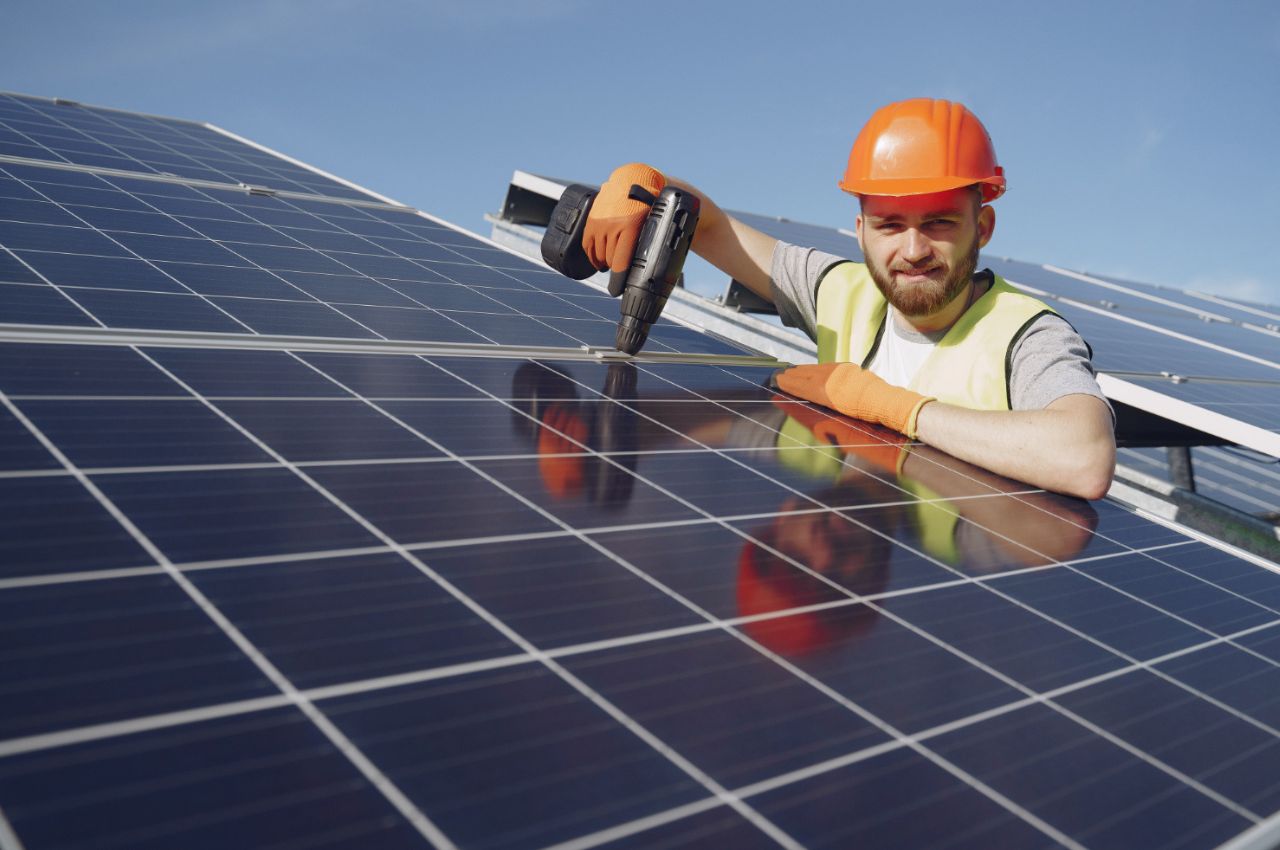
Step 3: Drilling and Preparation
With the territory marked out, installers proceed to drill the necessary holes for power cords that connect the solar panels to inverters. The choice of mounting system, whether direct mount or racking system, is dependent on the roof type. A qualified installer approved by the Clean Energy Council is crucial for a safe and effective installation. The racking system offers flexibility for later adjustments, allowing the panels to be securely positioned.
Step 4: Solar Panel Installation
This pivotal step involves mounting the solar panels onto the roof, positioning wires, and establishing connections. In some cases, direct connection to the main switchboard may not be feasible, requiring a separate sub-board. It’s essential to note that a consumption meter is integral for monitoring your solar power usage. Some installers may not include this in the package, so it’s important to clarify this aspect. To measure energy flow accurately, a CT coil wrapped around the cables is employed.
Step 5: Inverter Integration
While the first four steps focus on the physical installation of solar panels, the inverter is the unsung hero that transforms generated DC power into usable AC power for your home. The inverter is a crucial component, acting as the gateway for the energy produced by the panels to become consumable by household appliances. This conversion ensures that the energy harnessed from the sun is seamlessly integrated into your daily life.
Step 6: Electrical Assessment and Upgrades
Before the solar panels are connected to your home’s electrical system, a comprehensive electrical assessment is conducted. This step involves evaluating the existing wiring and making necessary upgrades to ensure compatibility with the solar panel system. It’s crucial to ensure that your electrical infrastructure can handle the additional load and safely integrate with the solar power system.
Step 7: Inverter Placement and Connection
With the solar panels securely mounted, the focus shifts to the placement and connection of the inverter. Installers strategically position the inverter in a location away from direct sunlight to prevent overheating. The inverter is then connected to the solar panels, establishing the vital link that transforms DC power into usable AC power for your household.
Step 8: Grid Connection and Net Metering
One of the key advantages of solar panel systems is the ability to connect to the electrical grid. This connection allows excess energy generated by your solar panels to be fed back into the grid, earning you credits. Net metering is employed to measure the difference between the electricity you consume and the surplus energy you contribute. This system ensures a fair and transparent exchange of energy, making your solar investment even more economically viable.
Step 9: Monitoring Systems Integration
To empower homeowners with real-time insights into their solar energy production and consumption, monitoring systems are integrated into the solar panel setup. These systems provide detailed information about energy generation, allowing you to track your environmental impact and optimize energy usage. Some advanced monitoring systems even offer mobile apps, enabling remote monitoring and control of your solar panel system.
Step 10: Final Inspection and Certification
Before concluding the installation process, a thorough inspection is conducted to ensure compliance with safety standards and regulations. This step involves a meticulous review of the entire solar panel system, including wiring, mounting, and connections. Once the system passes inspection, it is certified for operation. This certification is essential for eligibility for government incentives, rebates, and warranties.
Customer Education and Handover
To ensure that homeowners are well-equipped to maximize the benefits of their solar panel system, installers provide comprehensive education during the final handover. This includes guidance on system operation, maintenance requirements, and tips for optimizing energy consumption. A well-informed homeowner is better positioned to make the most of their solar investment and contribute to a sustainable future.
Conclusion:
The installation of solar panels is a comprehensive process that involves careful planning, precise execution, and the integration of key components like inverters. As a homeowner, it’s imperative to be well-informed and collaborate with experienced solar providers to ensure a successful transition to green energy.


5 thoughts on “How Solar Panels are Installed: 10 Step Guide”
Comments are closed.