
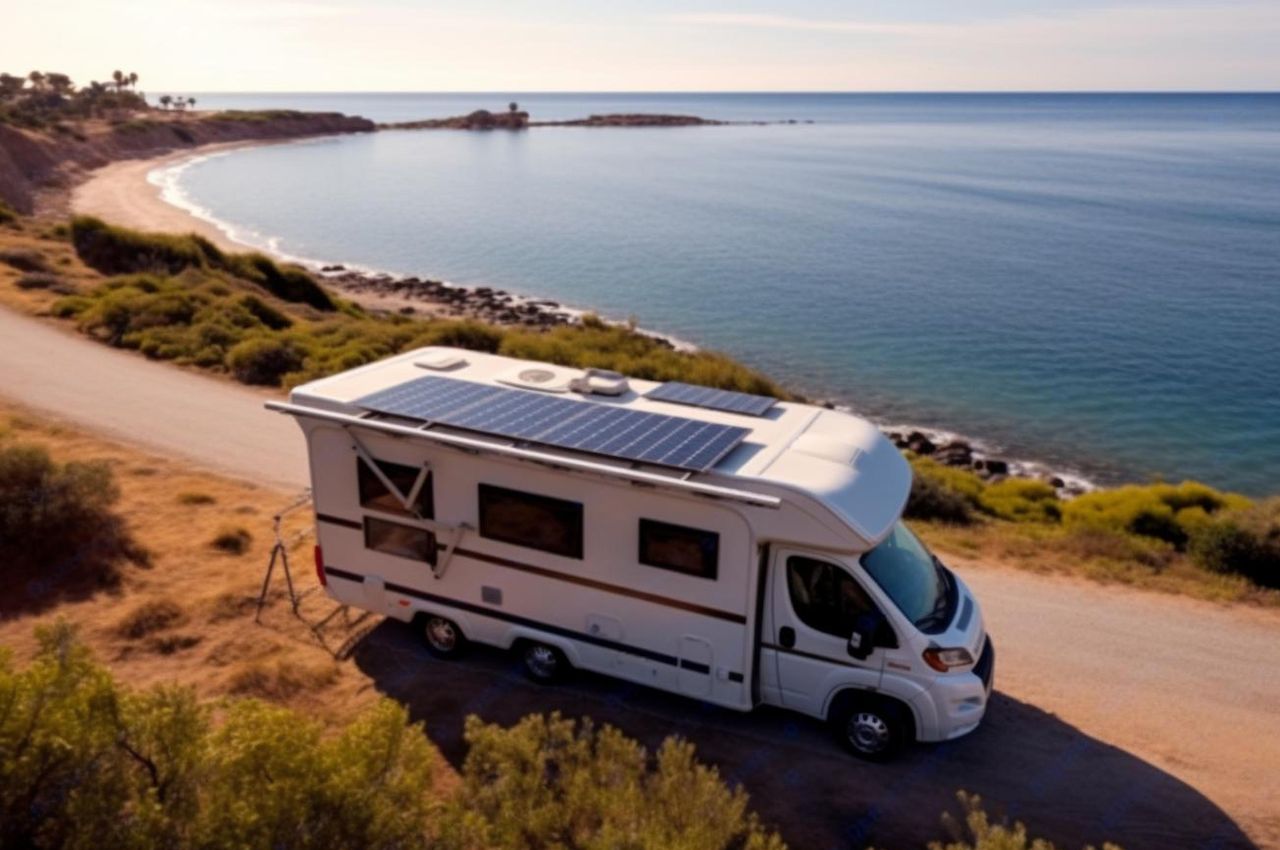
Solar panels are a fantastic way to harness renewable energy, and flexible solar panels have become increasingly popular due to their lightweight, bendable nature, making them ideal for mounting on non-flat surfaces like RVs and cars. In this guide, we’ll walk you through everything you need to know about mounting flexible solar panels, including the benefits, tools needed, step-by-step instructions, and tips for maintenance.
Benefits of Flexible Solar Panels
Before diving into the installation process, let’s highlight some key advantages of flexible solar panels:
- Flexibility and Adaptability: Unlike rigid panels, flexible solar panels can conform to curved surfaces, making them perfect for vehicles.
- Lightweight: They add minimal weight to your RV or car, which is crucial for maintaining fuel efficiency.
- Durability: Flexible panels are often more resistant to damage from impacts and vibrations.
- Ease of Installation: Typically easier to install on uneven surfaces without the need for bulky mounting hardware.
Tools and Materials Needed
- Flexible solar panels
- Adhesive (such as VHB tape or a suitable silicone adhesive)
- Cleaning supplies (soap, water, alcohol wipes)
- Cable ties and clamps
- Junction box (optional)
- Charge controller
- Inverter (if AC power is required)
- Wiring and connectors
- Drill and screws (optional for additional security)
Step-by-Step Installation Guide
1. Planning and Preparation
Assess Your Power Needs: Calculate your energy consumption to determine the number and size of panels required.
Choose the Location: Select an area on your RV or car that receives maximum sunlight throughout the day. Common locations include the roof, hood, or sides.
Clean the Surface: Thoroughly clean the mounting surface with soap and water, followed by alcohol wipes to ensure it is free of dirt, oil, and other residues that can affect adhesion.
2. Mounting the Panels
Test Fit the Panels: Before applying any adhesive, place the panels on the chosen surface to ensure proper fit and alignment.
Apply Adhesive: For most installations, VHB tape or silicone adhesive is recommended. Apply the adhesive to the back of the panel, ensuring even distribution to avoid air gaps.
Position the Panel: Carefully place the panel on the cleaned surface, starting at one end and pressing down firmly as you go along to eliminate any air pockets.
Secure the Edges: If desired, use additional adhesive along the edges of the panel to prevent lifting. Some installations may benefit from mechanical fasteners like screws or brackets for added security, but these are optional and depend on your specific setup.
3. Electrical Connections
Run the Wires: Connect the panel’s output wires to a junction box (if used), then run the wires along the roof or vehicle body to your charge controller location. Use cable ties and clamps to secure the wires, keeping them tidy and protected.
Connect to Charge Controller: Connect the panel wires to the charge controller, ensuring correct polarity. The charge controller regulates the voltage and current to protect your battery.
Battery Connection: From the charge controller, connect to your RV or car battery. Make sure to use the correct gauge wire and include a fuse for safety.
Inverter Installation: If you need AC power, install an inverter between the battery and your AC appliances. Follow the manufacturer’s instructions for proper installation.
4. Testing and Final Checks
Check Connections: Double-check all electrical connections for correct polarity and secure fittings.
Test the System: Turn on the charge controller and inverter (if used) to ensure the system is working correctly. Monitor the charge controller to see if it is receiving power from the panels and charging the battery.
Seal and Protect: Use silicone sealant around any drilled holes or exposed connections to prevent water ingress. Ensure all cables are secured and protected from abrasion.
Tips for Maintenance and Longevity
- Regular Cleaning: Keep the panels clean by wiping them down with a damp cloth to remove dust and debris.
- Inspect for Damage: Periodically check the panels and wiring for any signs of wear or damage, especially after long trips or harsh weather.
- Monitor Performance: Keep an eye on the system’s performance through the charge controller’s display. Any drop in performance could indicate a problem with the panels or connections.
Conclusion
Mounting flexible solar panels on your RV or car is a practical and efficient way to generate renewable energy on the go. With the right preparation and careful installation, you can enjoy the benefits of solar power, reducing your reliance on traditional power sources and enhancing your off-grid capabilities. Whether you’re a weekend camper or a full-time traveler, flexible solar panels provide a versatile solution to keep your batteries charged and your adventures powered.


1 thought on “How to Mount Flexible Solar Panels?”
Comments are closed.